I have now spent about 150 hours inside Claude Code.
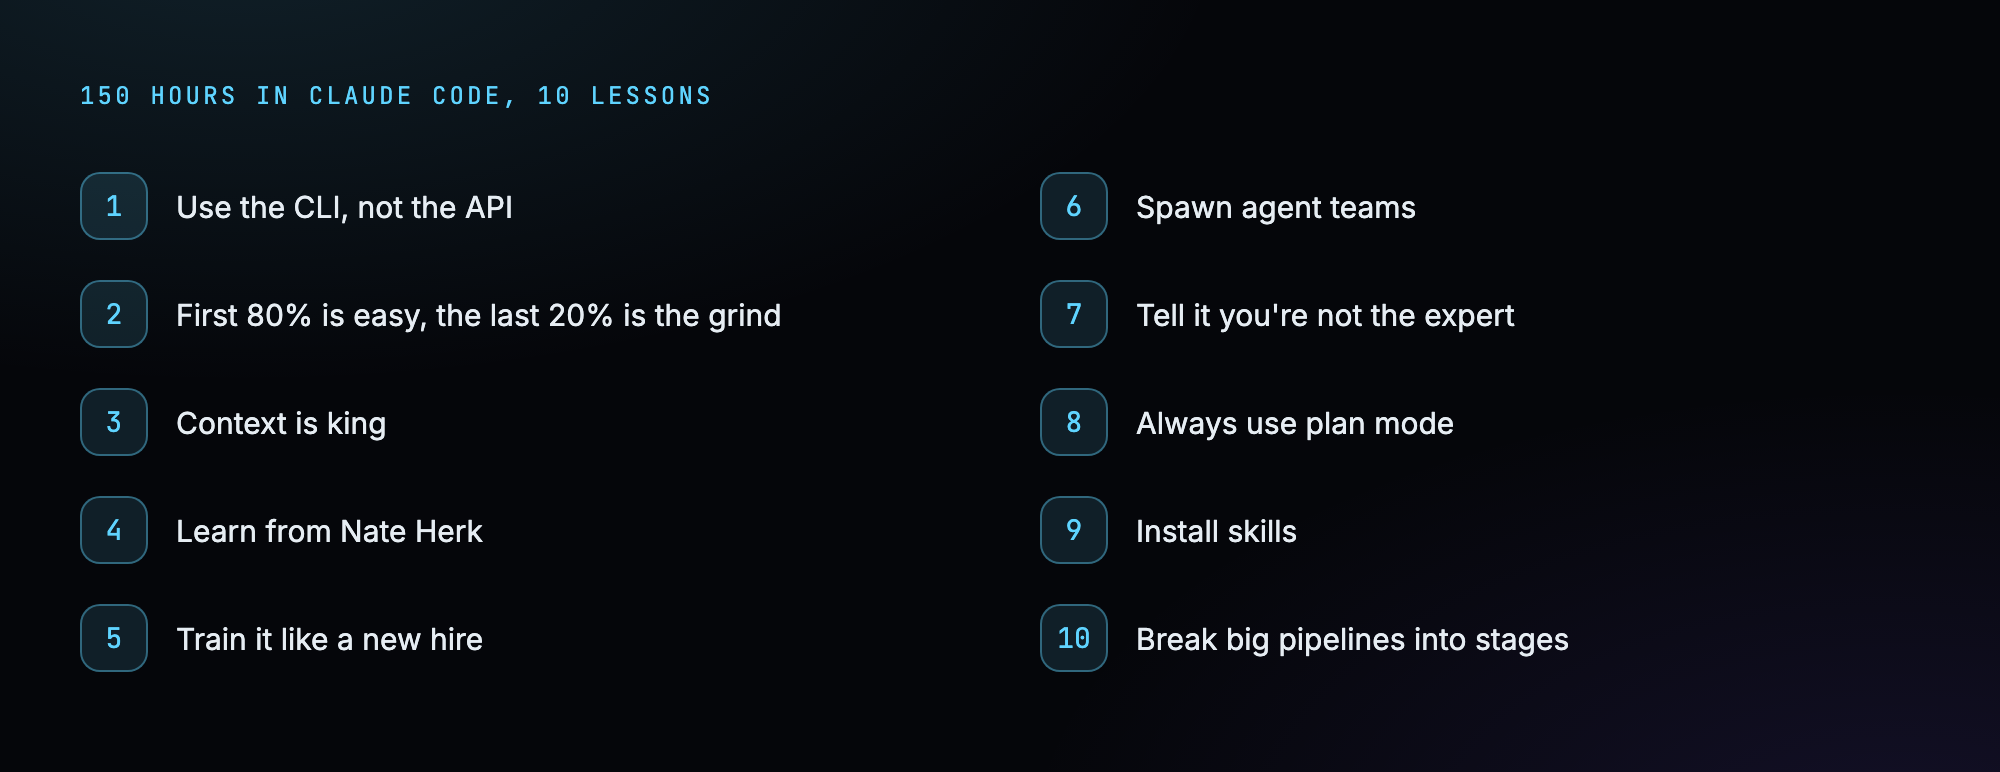
This post is the 10 biggest things I have learned so far. These are the lessons that 10x’d my output, and most of them I worked out the hard way.
Whether you are brand new to Claude Code or you have been at it a while, a few of these will save you real time and real money.
So if you are new here, I am Nick.
I am a 40-year-old non-techy millennial. I thought I had my whole plan figured out, and then AI killed my blogging business back in 2023.
Instead of staying scared of it, I am learning to build with it. Apps, tools, software, things people might actually pay for. This is episode four of that journey, and right now I am making zero dollars from AI, so I have a long way to go.

Here is everything those 150 hours taught me, the stuff that actually moved the needle.
The first one is the one I wish someone had told me on day one.
1. Use the CLI, not the API
This one tripped me up for weeks, and it has saved me hundreds of dollars.
When I started, I built a couple of tools by plugging straight into Anthropic’s API. Think of the API like a taxi meter. Every time the AI does something, the meter runs and you get charged a little more.
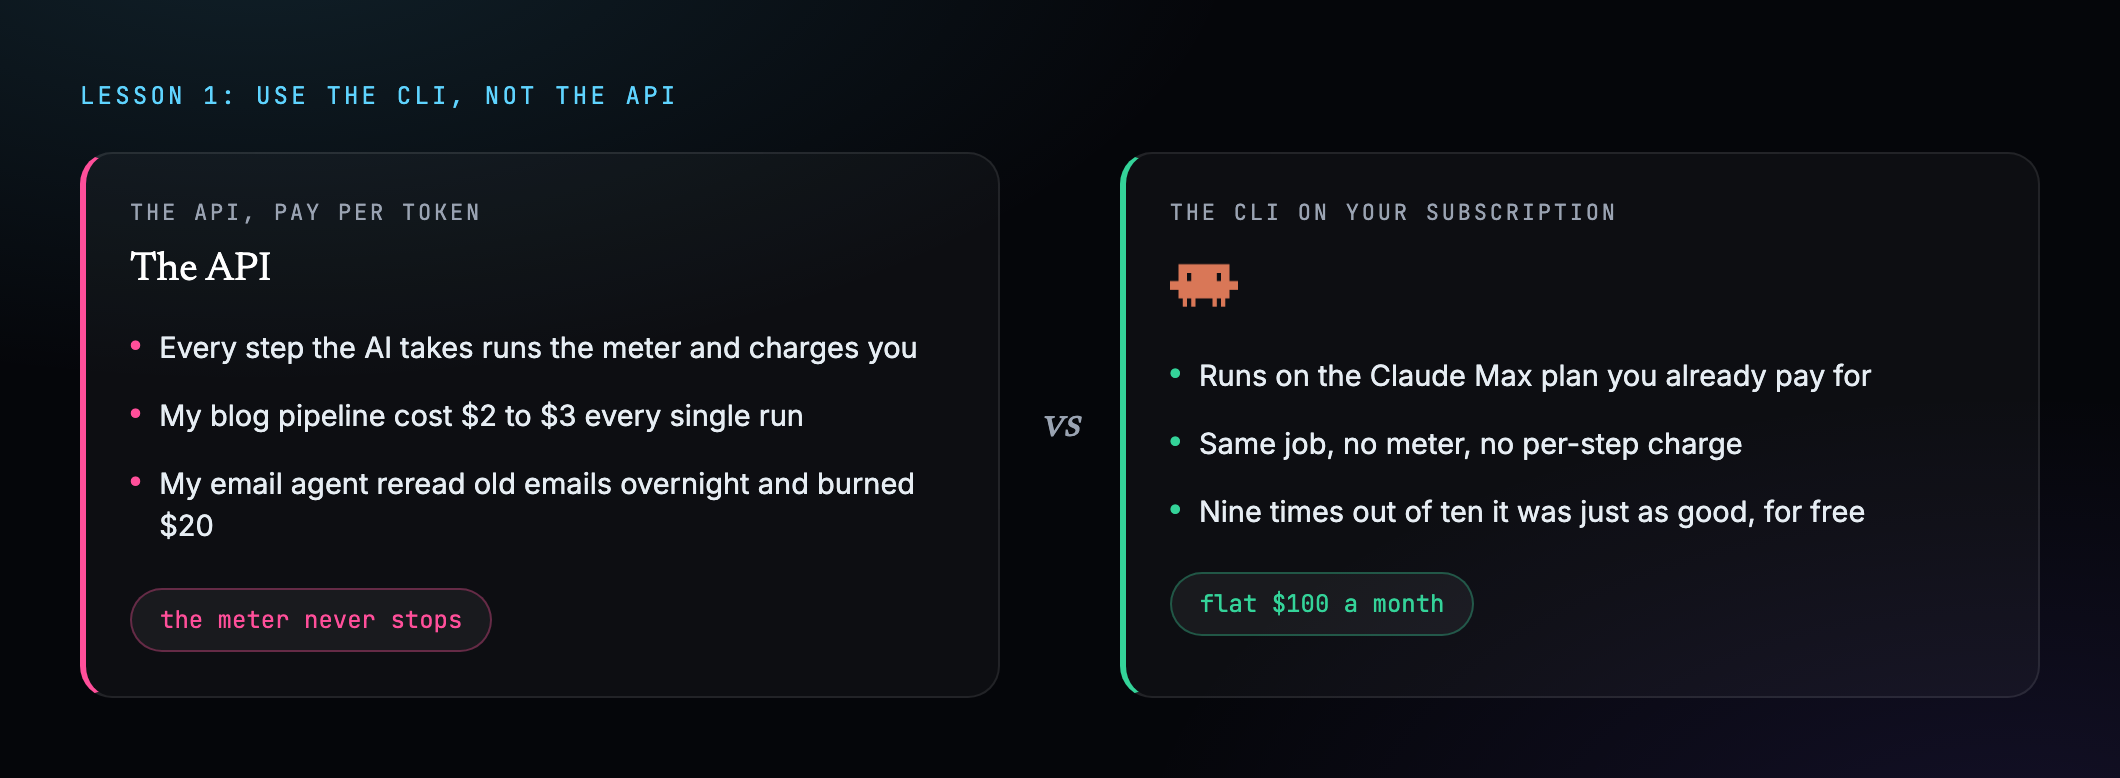
My blog-writing pipeline was costing me $2 to $3 every single run. My email agent, the one I named Winston, once lost the plot overnight, reread a giant pile of old emails for no reason, and burned about $20 in tokens while I slept.
Then I found out I could do the exact same work for free, through the Claude Code subscription I already pay $100 a month for. It does the same job, with no meter running.
If you have built pipelines that charge you every run, put Claude Code in plan mode and ask it to do the same task with the CLI on your subscription instead of the API. Nine times out of ten it did just as good a job, for nothing.
To make it concrete, I literally type something like: rebuild this so it runs through the Claude Code CLI on my subscription instead of the Anthropic API, same output. Then I watch the first run to make sure nothing broke.
2. The first 80% is easy. The last 20% is the grind.
The first time you describe something and Claude spits out a working version in minutes, your mind will be blown. You will feel like you are basically done.
You are not done. That is just the first burst.

Getting it from 80% to actually good enough to use is the slow, frustrating part. It is a lot of going back and forth, fixing one small thing, accidentally breaking another, then fixing that.
Go in expecting it. The first version feels like magic, and the final polish is where your patience gets tested.
3. Context is king
This might be the most important one on the list, and it took me a long time to get.
A single Claude Code conversation has a limited memory, like a desk that only has so much room on it. As the chat drags on you pile more onto the desk, and the AI gets sloppy, forgets things, and makes more mistakes.
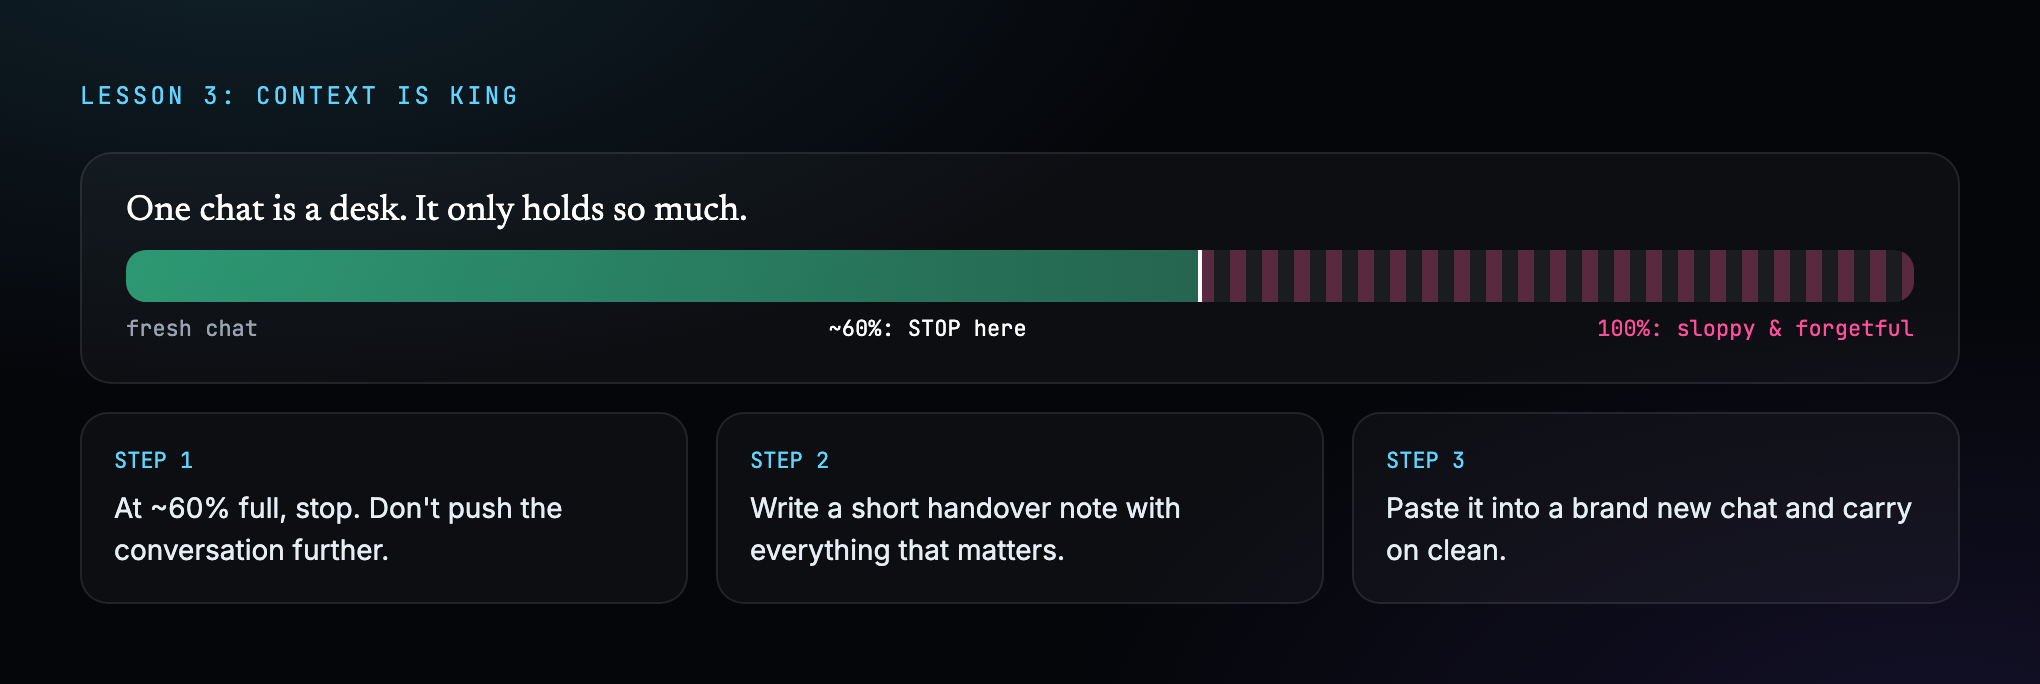
The fix is to never let one conversation run too long. There is a little progress circle near where you type. Once it is around 60% full, stop.
Write a short handover note with everything that matters, then paste it into a brand new chat. It is like clearing the desk, filing it neatly, and handing it to someone fresh who knows exactly what happened.
The note does not need to be fancy. I jot down what we were building, what is done, what is left, and any decision the next chat needs to know. Three or four lines is usually enough.
Your output gets noticeably better the moment you start doing this.
4. Learn from Nate Herk
This one is less a tip and more a thank you.
Almost everything I know about this stuff I learned from a guy named Nate Herk. He makes the clearest, most practical videos out there on actually using these tools, ones you can follow even with no technical background at all.

If you want to go to the source, learn it from him.
5. Train it like a new hire
This was a big mental shift for me. You have to train your AI the way you would train a brand new employee.

I used to think you type a request and the AI nails it first try. It does not work like that.
If you hired someone new, you would not say go run my business and walk out the door. You would write them a clear step-by-step SOP and keep correcting them for the first few weeks until they had it down.
Same with AI, except you can get Claude to write those training docs for you. They are called skills, and once one is dialled in, the AI does that job the way you want every single time, without you hovering over its shoulder.
The way I build one is simple. I get Claude to do the task once with me correcting it the whole way, then I tell it to write down exactly how we did it as a skill. Next time, it just follows the doc.
6. Spawn agent teams
This is one of the coolest things you can do, and one of the most expensive.
An agent is a single AI worker with its own memory that you hand a job to. Most of the time you have one of them working on one task. But you can tell Claude to spin up a whole team of them at once, each handling a different piece.
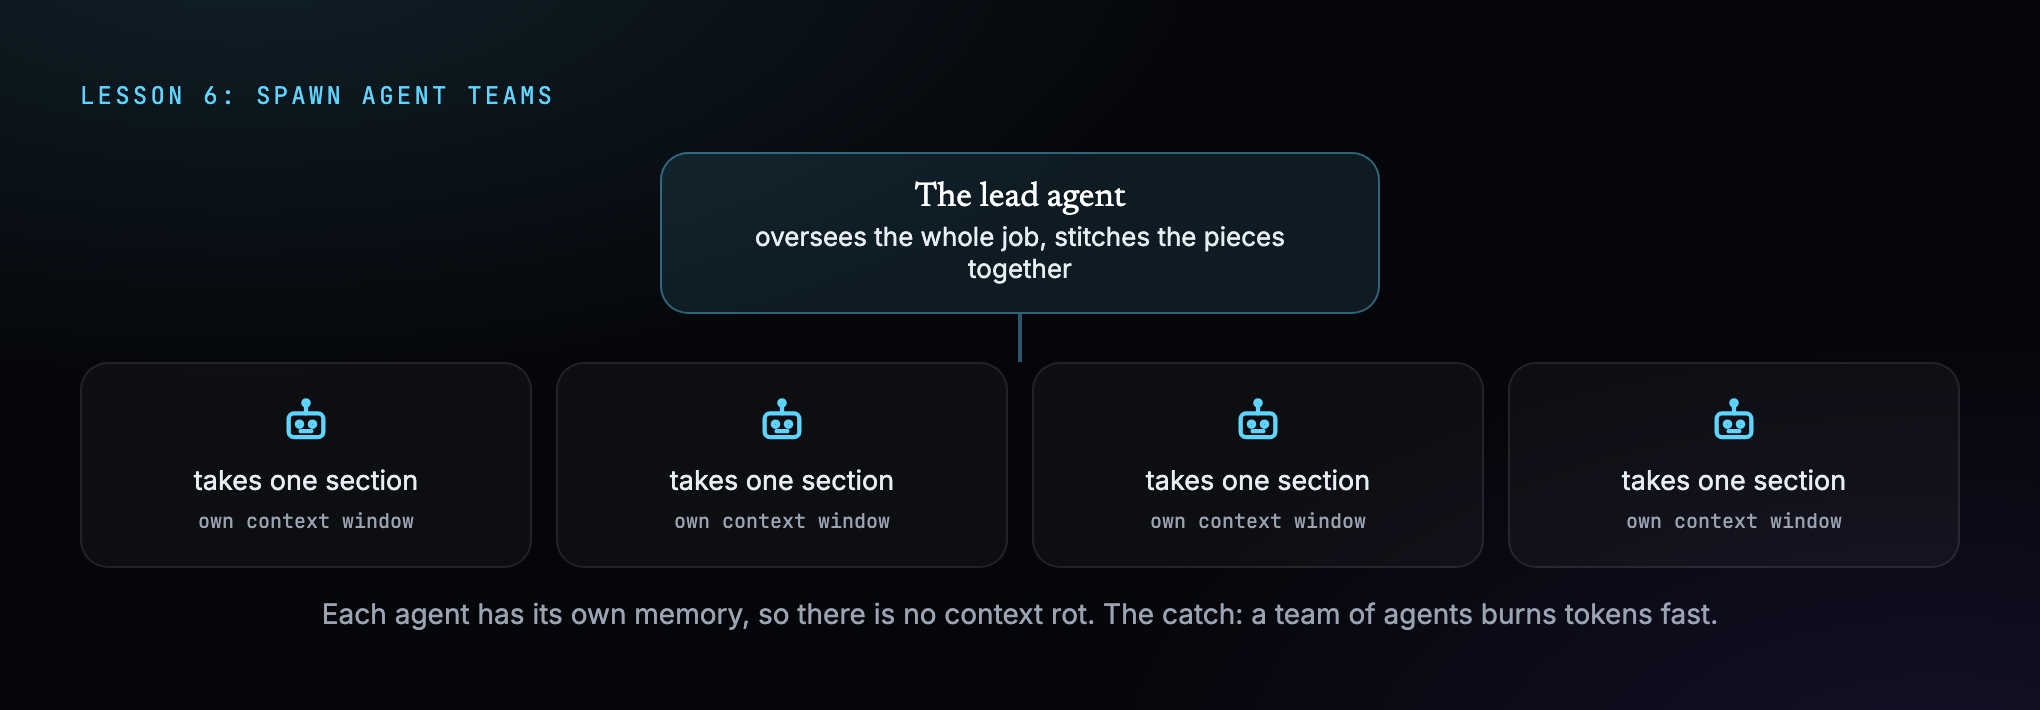
Because each agent has its own context window, you do not get the context rot from lesson three. I use agent teams on my bigger projects, like the video editor and the blog pipeline, and it has been a huge step up.
The catch is that every agent is doing real work, so a team burns through tokens fast. Tell Claude to spin up 10 agents and watch your session limit vanish.
I reach for this when the work splits into chunks that do not depend on each other, like writing five different sections of a post at the same time. For anything that has to happen in order, one agent is still better.
7. Tell it you don’t know what you’re talking about
This one is for beginners, and it made a massive difference for me.
By default these tools are people pleasers. You suggest an idea and they tell you it is brilliant, even when it is terrible, because they want to make you feel good.
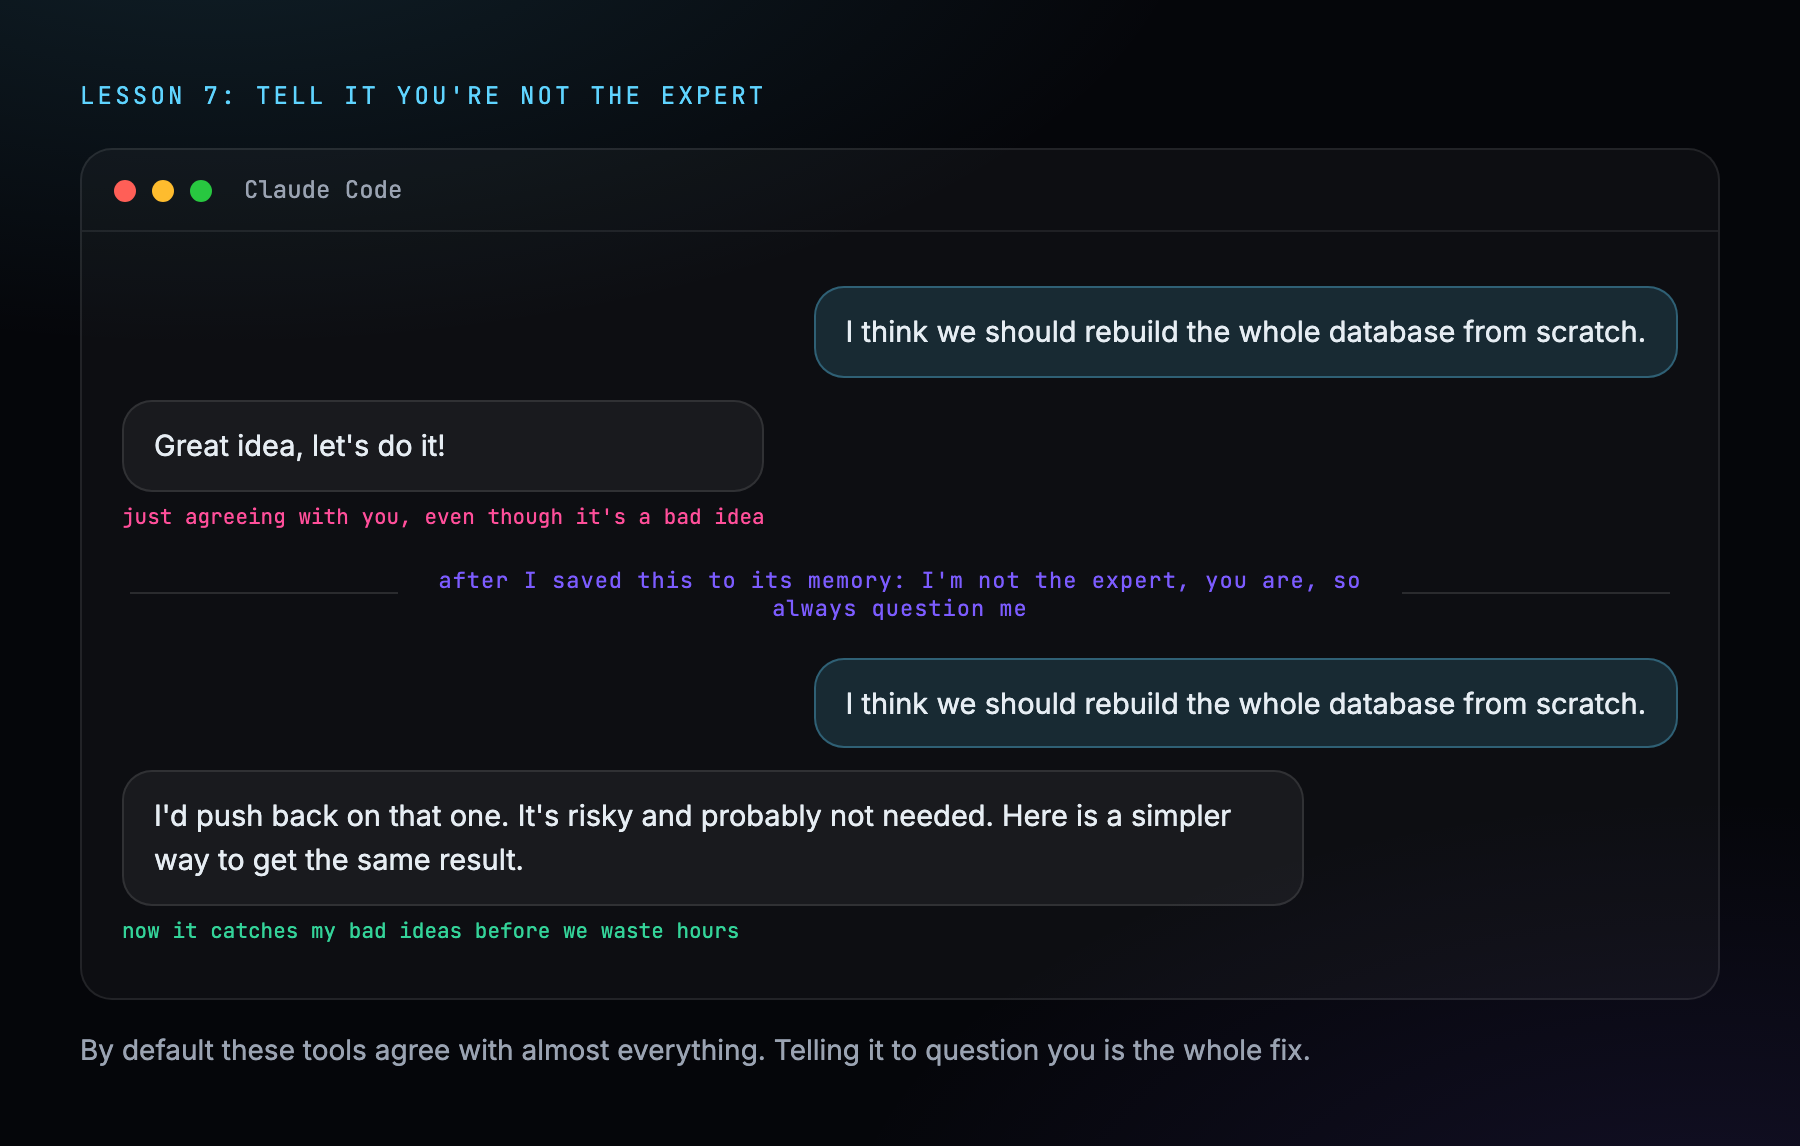
When you do not actually know what you are doing, like me, that is dangerous. It will happily let you walk down the wrong path for days before you realise.
So I told Claude to save into its permanent memory that I am not the expert, it is, and that it should always question me. Now it challenges my bad ideas before we waste three hours and a pile of tokens building them.
8. Always use plan mode
This one is huge and dead simple. Use plan mode before you build anything.
Most people, me included at the start, jump straight in and tell the AI to build the thing right now. It tries, but it is guessing at half of what you actually want.
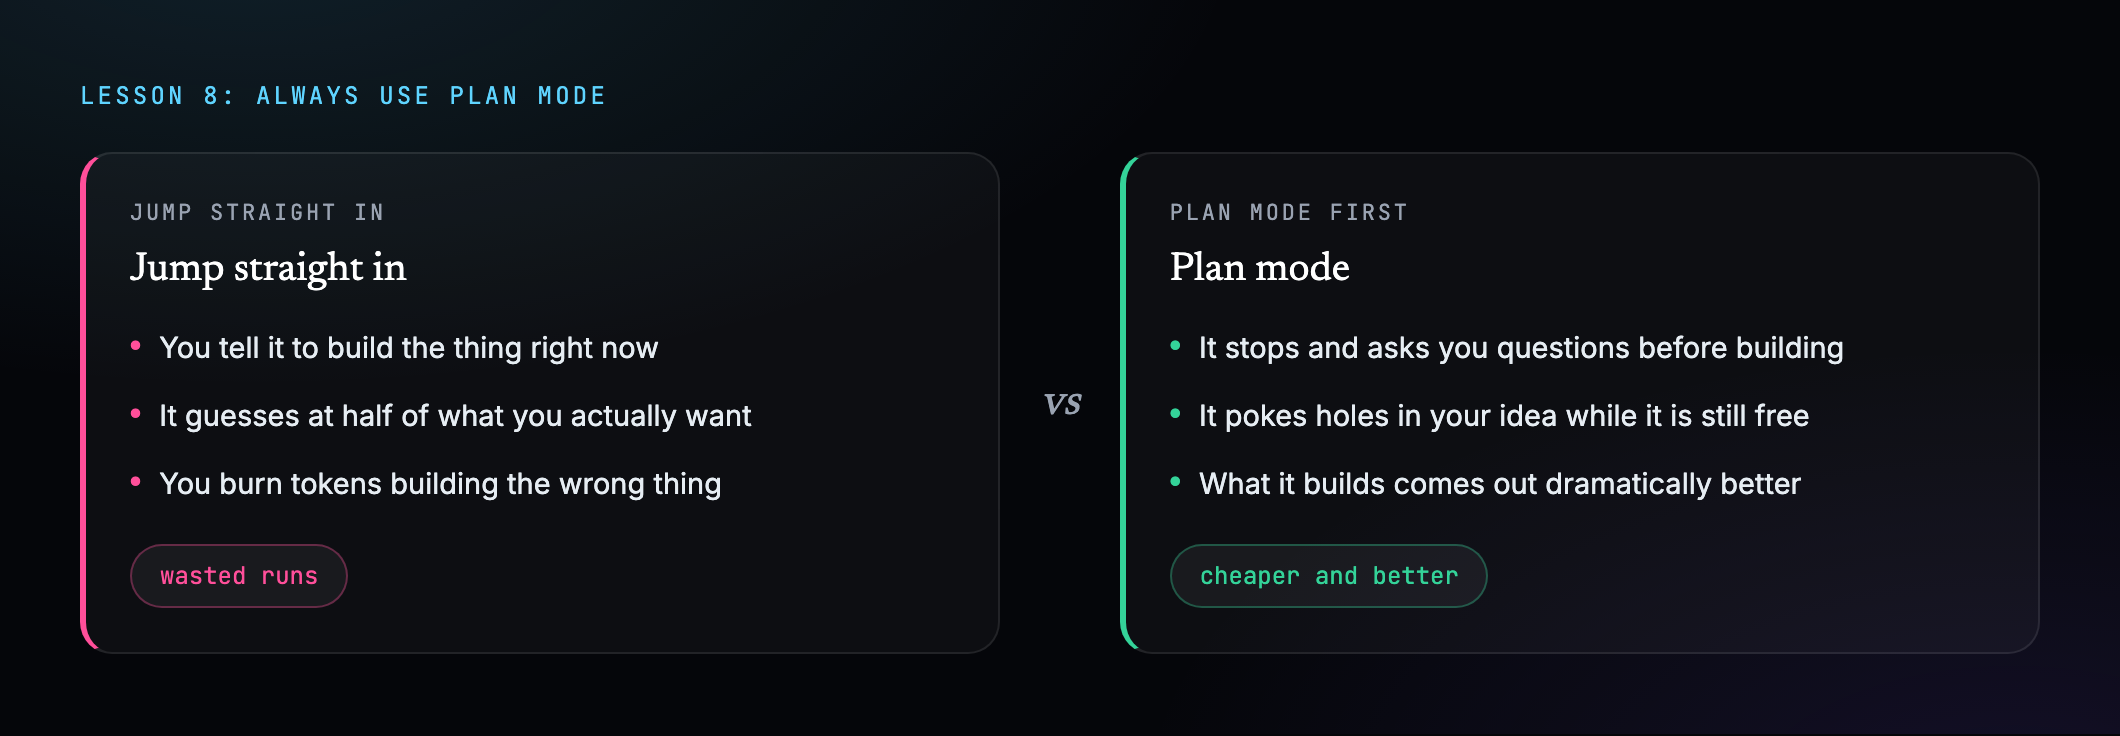
Plan mode is a setting where Claude stops and plans first. It asks what you want this to do, what about this situation, what if this happens. It pokes holes in your idea before a single thing gets built.
Then what it builds comes out dramatically better, because it is not guessing anymore. And it saves you money, because you are not burning tokens building the wrong thing.
9. Install skills
I have mentioned skills a few times, so let me explain what they are.
A skill is an add-on that teaches Claude how to do one specific thing really well, like handing a new hire a specialised certification. Out of the box Claude is a smart generalist. A skill hands it a full instruction manual for one job, written by someone who already worked out the best way to do it.
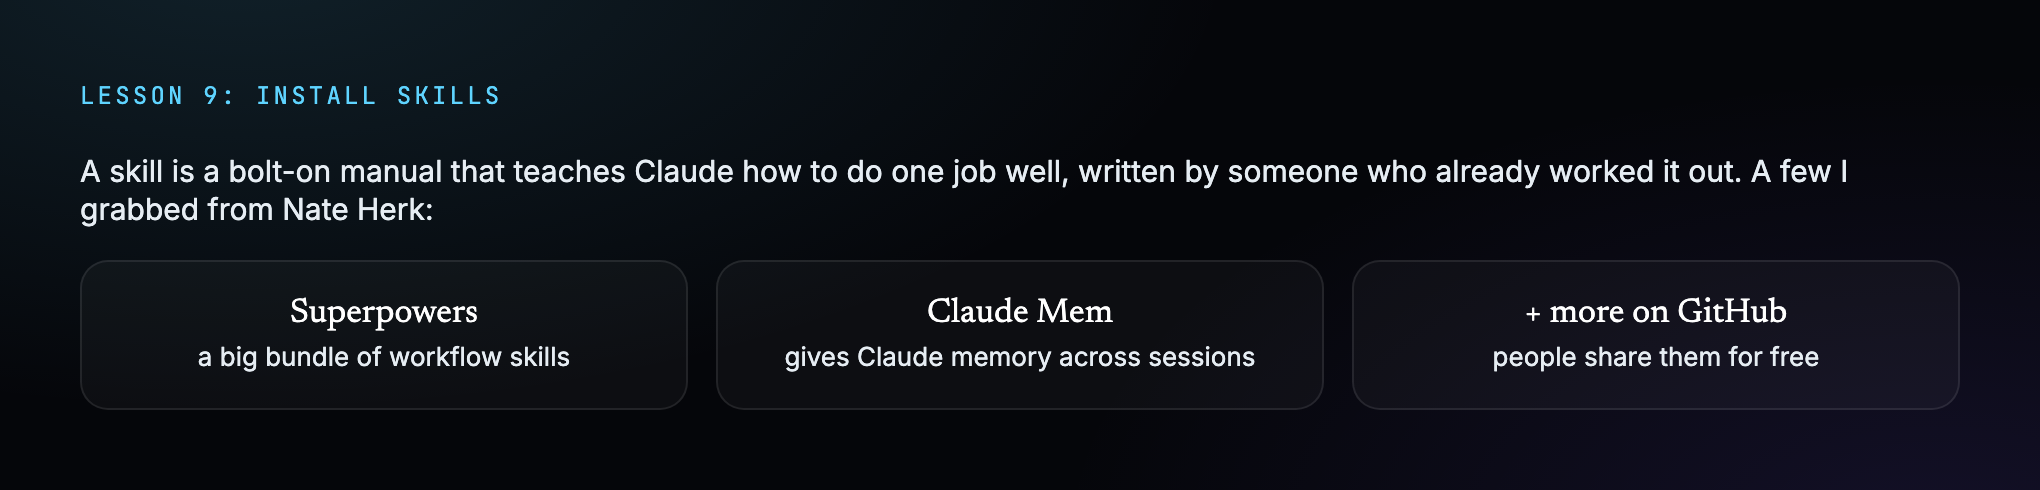
I found a handful of these through Nate Herk, free on GitHub. Superpowers and Claude Mem are the two I lean on most. You can literally tell Claude to install one.
It changed how the whole thing works for me. My AI went from a smart generalist to having a folder of specialists it can reach for whenever it needs them.
10. Break big pipelines into stages
This one is a bit more advanced, but it matters. Sometimes it is better to break one big workflow into a bunch of smaller ones.
Take my blog-writing pipeline. My first instinct was one giant push-button machine. Hit go and it does everything: the writing, the internal links, the photos, the affiliate links, all of it.
That sounds amazing until something breaks in the middle. Then the whole thing is a sealed box, and you are standing there asking which of the 40 steps actually failed.
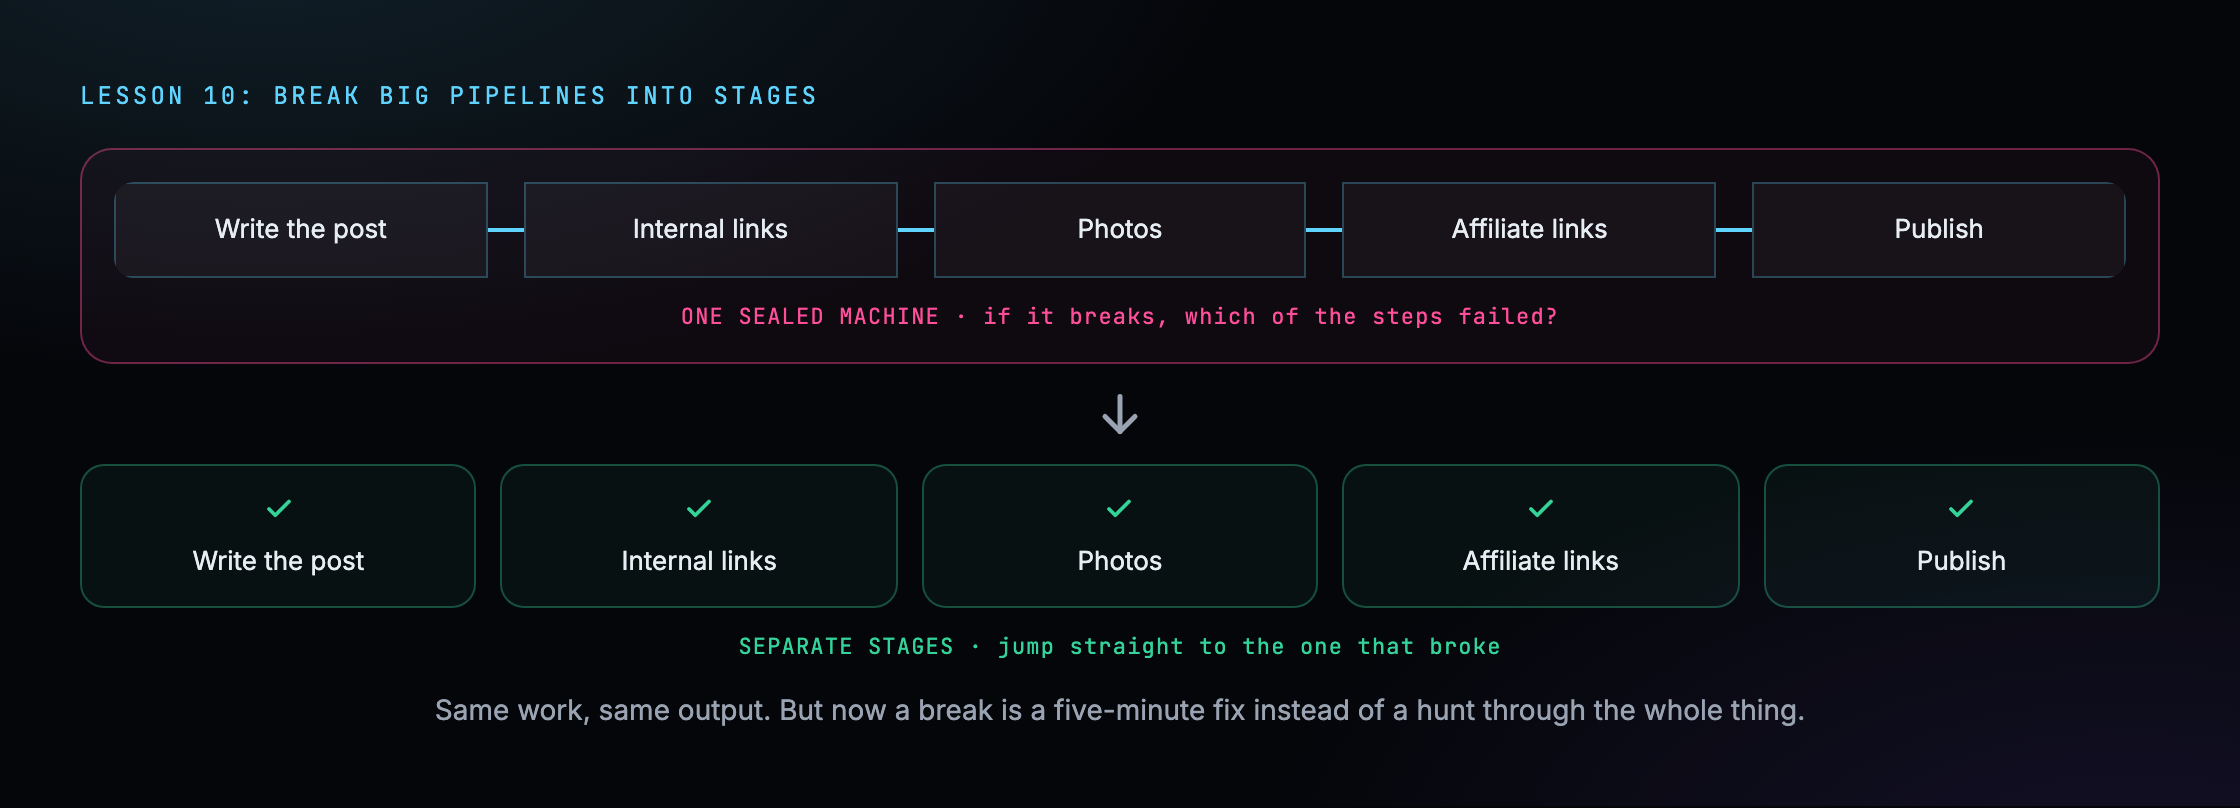
So I broke it into separate stages, each its own skill doc or its own agent. Now if something breaks, I know exactly which stage to look at, and I can jump in at any point instead of running the whole thing from scratch.
The best part is I did not lose anything. I can still run all the stages back to back when I want. But when I need to fix one piece, those separate stages save me hours.
A rough rule I use now: if a workflow has more than about five or six steps, or it costs real money every run, it is probably worth splitting up.
Where this leaves me
Those are the 10 biggest things I have learned from spending way too long inside Claude Code.
If even one of them saves you a headache I had to learn the hard way, this was worth writing.
I am at the start of this, making zero dollars from it so far, and documenting the whole climb here. Come along for the ride.